POSPac FAQ
- Go to the Applanix website: applanix.com/.
- Log in. Register if necessary.
- Go to Support.
- Scroll down to Land Support.
- Click Downloads and Updates.
- Scroll down to the POSPac MMS section.
- Download the required POSPac version.
- Unzip the POSPac MMS installation files and run Setup.exe to start the installation.
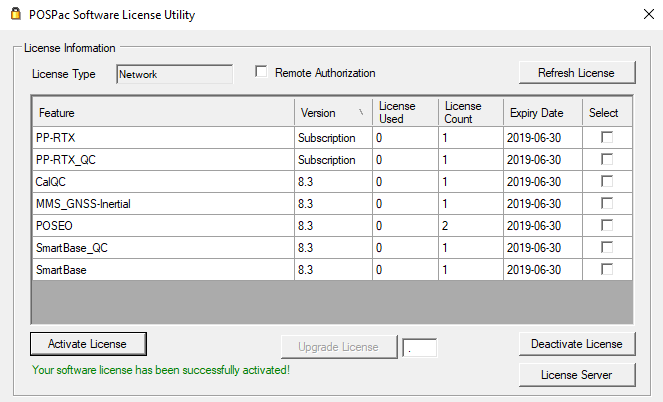
For license activation an entitlement ID is required. To activate, start the POSPac Software License Utility, click Activate, and follow the instructions. POSPac MMS and the network license utility can be downloaded here: applanix.com/support/airborne-support/downloads-and-updates.html.
The license activation and deactivation utilities use HTTP/HTTPs protocol to communicate with the license server web portal:
- server: licensing.applanix.com
- HTTP Port: 8080, 31350
- SSL Port: 8443
The firewall must allow communication to these ports.
Checking out the license takes it out of the server and puts it locally on your computer, allowing you to run POSPac outside of the server’s network. To check it out, select the license, and click Check Out Selected. Your license type will then become Commuter rather than Network and the license count will become the number of licenses you checked out. To put it back on the server, make sure your computer is connected on the network, select the licenses to check back in, and click Check In All.
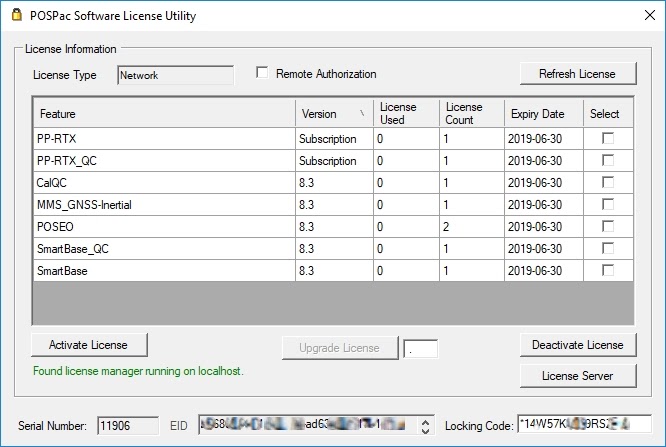
- Make sure the computer is connected to the Internet and start the Software License Utility.
-
Copy the EID(s).
-
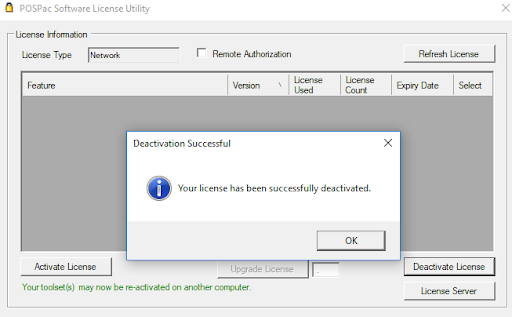
Click Deactivate License.
-
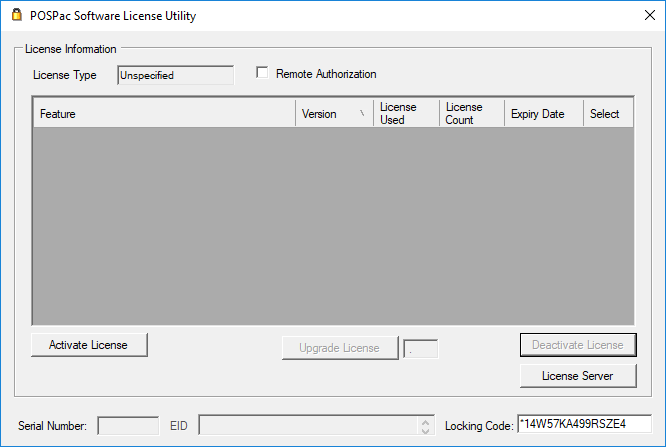
On the other computer, install POSPac, make sure it is connected to the Internet and start the Software License Utility.
-
Click Activate License.
-
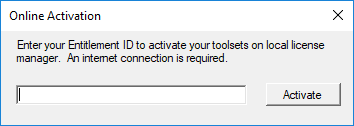
Enter the EID and click Activate. Repeat for each EID if you have more than one.
No, POSPac and associated packages are not affected by the Log4J vulnerability identified in December 2021.
Last modified
10 January 2022
The date format is mm/dd/yyyy and it is taken from the POS data.
- In a high multipath environment it is helpful to stop a few times (for example, at a red light) because the DMI tells the IMU it has stopped.
- SmartBase: the computed base is static but the corrections are following the vehicle trajectory.
- When importing POS data, open the message logs and look for IMU anomalies. POSPac will crash when postprocessing more than 4 consecutive missing IMU frames.
- Gaps in observation data are normal in LV. Gaps in navigation can be ignored.
- You can compare two PP results of the same trajectory in Plots>View>NAVDIFF.
- You can compare the GNSS solution to the PP solution from the same project in NavDiff as well. Prim.GNSS lever arms required.
When importing the raw files, if a Rover antenna type is unknown message appears, then select the appropriate model:
- MX1, MX2 (until 8318170), MX3, MX8: Zephyr Model 2
- MX2 (8318171 and later): Zephyr Model 3
- MX7 HW 2.0: Tallysman > 33-3870. If not available (POSPac 8.1 and older), use LV59.
- MX7 HW 3.0 / MX9: Tallysman > 33-3970 GNSS
If any of these selections are not available in the list, you will need to install the Trimble Configuration Utility from this link: trimble.com/infrastructure/trimbleconfiguration_ts.aspx
These settings can also be set in Project>Mission>POS>Set rover antenna.
If the antenna is not set properly, the solution may be slightly degraded compared to the known antenna case. If the antenna model is not available in POSPac, leave it set to Unknown.
Since POSPac 6.2 SP1, POSPac converts all base station coordinates into ITRF00 current epoch, current epoch being the mission epoch. If the base station has been imported with the Find Base tool, the coordinates are automatically “office entered”, meaning that they come from the POSPac internal database and that they are in ITRF00 current epoch. If the base has been imported manually (from a Rinex file), the coordinates are those of the Rinex file and you must assign the correct reference frame for these coordinates.
It is possible to add your own base station service to the Find Base Stations tool. As long as the files are available via FTP or on a local network server, then they can be added to the Find Stations tool. See this document that covers the two methods for creating a user database using the Coordinate Manager GUI in POSPac, or by creating an xml file.
Applanix recommends to add one station in the Coordinate manager and then tap the arrow next to the Export Coordinates button and select Comma-separated text file to export them as a csv file.
You can then add new lines for each additional station following the same format. Then import the list using the Import Coordinates button.
Yes. 24h of good data, 4 stations minimum.
In fact RMS is one sigma (one standard deviation), so the offset should be under the RMS about 60% of the time. And this is only positive. As the error is on both sides, you need to double. To englobe 99% of the values, you need 3 sigma. So 6 times the RMS. And RMS is only a relative calculation. It doesn’t give the real error.
This setting has no effect. It is better to manually put the WGS84 coordinates of the base station rather than converting the datum with POSPac because the algorithms are not very accurate.
No, this value is the real-time solution. It is discarded during postprocessing. The full IMU and GNSS data is still recorded and used during postprocessing.
No. It is discarded.
Yes, the LV 520 can support Beidou in RT and PP so long as you have a BD982 receiver with FW v4.84 and PCS FW v8.01 or later.
Last modified
17 June 2021
