Chain / Offset method
To use this method you must have two reference nodes positioned in the survey and know the chain distance and the offset distance, measured using a tape measure or a laser rangefinder.
This method is useful if, for example, you cannot measure a GNSS position for the target node but you have two nodes nearby you can use as reference nodes. You would draw a construction line between them and then measure the chain distance along the construction line until you are in the line with the target, then measure the offset distance to the target node.
To collect a point using the Chain / Offset method:
- In the Home screen, tap
 then tap
  on the Collection Method bar to start the Chain / Offset method.
If the option is not available in the Data Collection screen, go to Settings / Custom in the Home screen to add it.
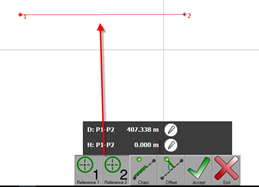
- Select the two reference nodes that define the construction line. Tap
 and enter the horizontal chain distance from node 1. Then tap
  and tap the second node. The construction line appears on the map.
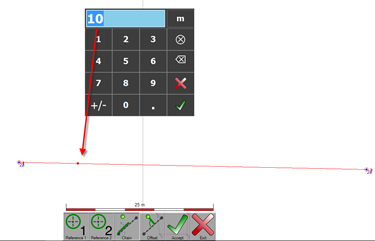
- Measure and enter the horizontal chain distance from node 1. The chain value measurement is the distance from the first base node, along a line that joins the two base nodes and possibly beyond it, to a point where the normal to that line from the target node meets it. Tap
 and enter the distance using the keypad.
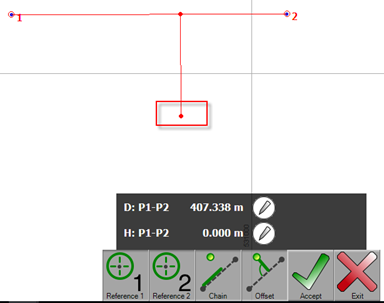
- Measure the horizontal offset distance. The offset value measurement is the distance along the normal from the target node to the end of the chain. Tap
 and enter the distance using the keypad. The target node appears on the map. Positive values are right of the chain line, negative values left of it.
You can easily change the direction of the offset by clicking on the map. Tap the map to toggle between the two possible calculated positions for the target node.
If you enter a negative distance value, you can use this method as the Extend method.
- The calculated distance between the two reference points is displayed. If required, you can enter the measured ground distance and/or the height difference between the two points. Tap
 and enter the distance. The values entered are checked against the defined tolerance:
The distance entered is listed in the Point Manager dialog when you use the Measured distance filter.
You can preview, view, edit and delete the available distances.
- Tap
 to create the node in the position shown.
When the position of the node has been calculated, the construction line is still active; you do not have to select the reference points again, you can enter the new required values.